Inkscape for Noobs – Part II: Practice
This is part two of the Inkscape workshop for noobs. If you can’t yet make sense of the terms “vector graphics”, “SVG”, “open source”, “path” and “community”, it is recommended that you first take a look at part I of this workshop, to learn more about the basic principles of vector graphics.
This part of the workshop is meant to be hands-on – so the first thing you need to do now is to download the workshop file and to open it with Inkscape. Keep your browser window open to be able to switch between the two applications.
Here in your web browser, you can read the explanations and watch the animations, while in Inkscape, you can try out your new knowledge right away.
This tutorial is quite long, and contains a really huge amount of information. So if you need a break somewhere in the middle, just take it and come back here later, when you’re ready. It also took me longer than a single day to write all of this down (and much longer to learn it) ;-)
About the images:
In the screenshots and animations for this article, the icons look different from the standard icons which come installed with Inkscape. Their position, though, is identical, and often the only difference is the color. This shows that it is even possible to adapt the icons in Inkscape to your liking – they are just another SVG file themselves!
The colors also don’t look like this in the real Inkscape! The number of colors used in the animations had to be reduced, so the files would not become too huge for downloading. You will also note that in your files, you will see different color gradients and fonts in the lists than there are in the images here. Sometimes, you will also see a German word or tooltip. This is because I’m German, and I have used the German Inkscape interface to record the animations. If there’s anything you think really needs a translation, please let me know in a comment.
When you click on the images, you can look at a larger version – and if you’re not using Javascript in your browser, you can just use the back button of your browser to return to this page.
The Inkscape Window
After you have opened the file, you should be seeing something like this (minus the docked dialog on the right side, as you haven’t opened any yet):
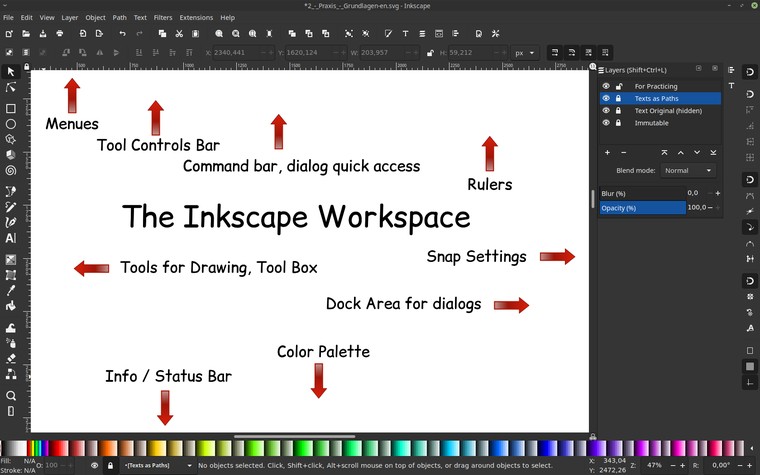
The big white area in the center of your screen is the canvas. Here you can become creative and do most jobs using your mouse. At the center of the canvas, there is the page area, which is framed by a thin dark border. In our practice document, this page is very long, so that you probably won’t be able to see its borders right away.
To the right and directly below the canvas, there are the scroll bars, which you can use to quickly move around the document. At the canvas’ top and to its left you can see the page rulers, which allow you to roughly estimate distances and which are used to create guide lines.
Click on one of the two rulers now, hold the mouse button down and drag the mouse on the canvas. Let go of the mouse button. You have just created your first guide line ;-) – if you want to get rid of it again now, just drag it back into the ruler.
At the very top of the window, there are the different menus, which give you access to a tremendous amount of different functions and dialogs. Take your time to take a look around, so you can get a rough first impression of all the possibilities Inkscape has to offer. Don’t be afraid, even if at first, all these terms you will see may seem confusing!
The basic functionalities of Inkscape are easy to learn and to use, and at the beginning, you will easily do without most of the cool extra functionalities. On the other hand, it is useful to at least know that they exist, in case you should need them some time.
Below the menu bar, there is the bar for quick access to the dialogs (command bar). Depending on the format of your screen, this bar may also be found vertically on the right side of the Inkscape window. From here, you can access all the important dialogs quickly – e.g. the one for saving, the one for the text properties or the one that allows you to change fill and stroke. Furthermore, this bar also contains the buttons for undoing and grouping. Hover over each button with the mouse cursor and read the tool tips, to find out what they are for.
Below the command bar, you can see the tool controls bar. The icons in this bar change, depending upon the tool which is currently active. Here, too, every field or button shows a tool tip when you point at it with the mouse. Try it out!
At the left, there is your tool box. This is the place where you can choose if you’d like to draw, for example, a rectangle, a circle or if you’d rather like to make a new path. When you’ve read all tooltips for the tool box, come back here to read on.
At the very bottom of the window, you can see the status bar. In this place, Inkscape displays different bits of information for you, of which it thinks they might be useful right now. For example, you can see which layer you are currently working on, which position the mouse cursor is at right now, which fill and stroke color the currently selcted object has, and foremost, you always get to see a hint about the currently selected type of object, the number of selected objects, or about how to use the active tool. And if something doesn’t work as you expect it to work, you should always first take a look into the status bar. Very often, it will give you precious hints, that can help you to get to the root of the problem.
Directly above the status bar, there’s the color palette. A left-click on one of the colored fields in the palette will change the fill color of the selected objects to that color.
At the very right of the Inkscape window, there is the bar for the snap settings. Right at the beginning, you will probably not need it yet – snapping may even be confusing, as it prevents you from freely moving objects about (as they will often ‘jump’ to the next possible place where they can snap to). If in your file, like in this screenshot, the uppermost button is activated, click on it, to deactivate snapping. Now use your mouse to discover what the snap bar tool tips say.
To the left of the snap bar, there’s the area where dialogs will dock to. If at some point of time, a dialog wouldn’t open, look here first. It might be that it has been minimized by a click on the small triangle in the dialog’s top right corner, and can be found as a small icon in the dock (as can be seen in the screenshot, the two small icons to the right of the layers dialog).
Moving around the Document
Scrolling
There are a range of options available for moving the canvas.
You can:
- use the scroll bars
- move the mouse wheel (hold
Shiftfor going sideways) - hold
Ctrland press thearrow keys - hold down the
space barand move the mouse - hold down the mouse wheel and move the mouse
Now try all these different variants yourself – maybe you already know which one will be your favourite method?
Zooming
For setting the current zoom level, again, Inkscape offers different ways how to do it:
- hold
Ctrldown and turn the mouse wheel - use the zoom tool from the tool box at the left (read the infos in the status bar!)
- enter the zoom factor directly in the bottom right corner, or use the small arrows to change it, or use the scroll wheel while the mouse cursor is above the number field
- The numbers in your number pad zoom to preset values, e.g. the
5will zoom to page, the4will zoom to the whole drawing and the3to the selected object. - When you hold down the
qkey, the current view area will be zoomed to be twice as large, or, if an object is selected, to the object.
When you have tried all of these – and have also zoomed in very, very closely to the red rectangle, you may continue ;-)
I almost always use the first option for zooming, because this doesn’t only work in Inkscape, but also in my web browser and in other graphic programs.
Which option will you be using?
The Tools
As we now know how to find our way around in the drawing, it’s finally time to try out the tools and to change things in the drawing.
For this purpose, I have prepared the file in a way that prevents you from changing the important things (text and background images, which are locked). I have also added a couple of example objects, which you can use to try everything out.
In this beginner workshop, we will by no means get to know all tools – but with this selection you will be able to easily create respectable drawings.
Using scrolling and zooming, go to the next section, Selection / Move Tool, in the workshop file. Then come back here to read the corresponding section, watch the animation, and then try out the mentioned functionality in the file by yourself – continue in this manner, jumping back and forth between Inkscape and your browser, until you need a break or have reached the end of this workshop.
Don’t believe that it will be enough to just read through it all and look at the nice moving pictures ;-)
That way, you’ll only learn half as much (and you will have a lot less fun…)!
Only by trying things out you will find out which of the offered options can be useful for you, and it will also be much easier to memorize the new impressions.
Let’s go!
The Selection Tool
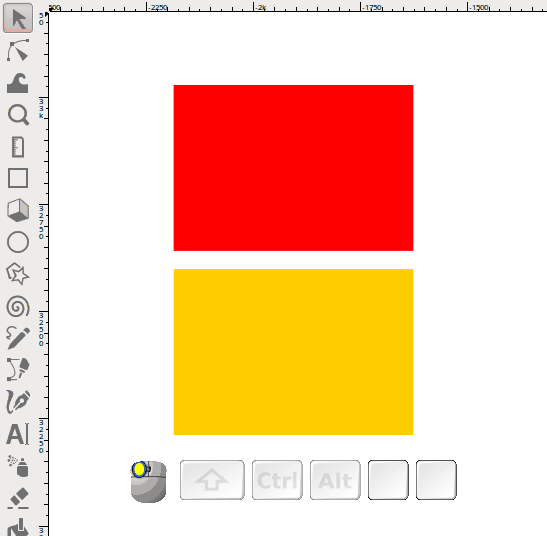
With the selection tool, you can select objects (obviously ;-) ). Hold Shift to add more objects to the selection.
The tool also can be used to:
- move objects,
- change their size (hold
Ctrlto preserve the aspect ratio), - skew and
- rotate objects (when you hold
Ctrlwhile rotating, the object will be rotated in the preset 15° steps).
Now try to move, rotate and scale the red rectangle to make it fit into the dashed frames. To enter the rotation mode, click a second time on a selected object. Also resize the rectangle while keeping its aspect ratio.
The Node Tool
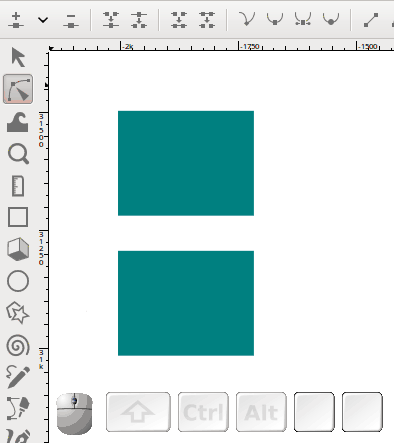
You can use the node tool to edit paths. Click with it on the rectangle at the top to select it. Now drag the bottom right node to change the shape of the rectangular path to fit the dashed shape.
Drag on one of the connecting lines (a path segment) between two nodes of the rectangle in the middle to change its shape. Also try out what happens when you drag the two handles of a node to modify the shape the neighbouring path segment (if you have a totally straight path segment, these handles aren’t visible (they are ‘retracted’), but you can just drag a tiny bit on the path segment to make them show up.).
On the last rectangle, experiment with automatic rounding. In order to do so, select all nodes by dragging a selection rectangle (also called rubberband selection) around them with the mouse. Now click on the button Make selected nodes auto-smooth in the tool control bar at the top. Its corners look a lot smoother now, right?
The Rectangle Tool
Use the The rectangle tool to create squares and rectangles, optionally with rounded corners. Just click with it on the canvas and drag with the mouse to create a rectangle.
If you would prefer to draw a square, hold the Ctrl key down while dragging in a roughly diagonal direction.
If you continue to drag and vary the drag direction a bit more, while holding down the Ctrl key, the rectangle will ‘jump’ to the next whole-number width-to-height ratio. Keep an eye on the status bar – the width-to-height ratio is displayed there!
To round the corners of a rectangle, pull on the little circle in its upper right corner. Now, another circle-shaped handle will appear. If you drag that one, the corner rounding will become asymmetrical.
Rounded corners can be removed again by pressing the right-most button in the rectangle tool’s tool controls.
The square-shaped handles allow you to change the size of the rectangle.
The Ellipse Tool
The ellipse tool creates circles, ellipses, arcs and circle segments. It almost works in the same way as the rectangle tool.
Now fill the dashed shapes with ellipses and a circle. Remember the status bar!
To create circle segments and arcs, pull on the round handles. Note the difference between the result you get when the mouse is inside or outside the ellipse while dragging!
The button on the far right of the ellipse tool’s tool controls allows you to turn a segment or an arc back into a closed circle or ellipse.
The square-shaped handles will, again, change the size.
Stars and Polygons
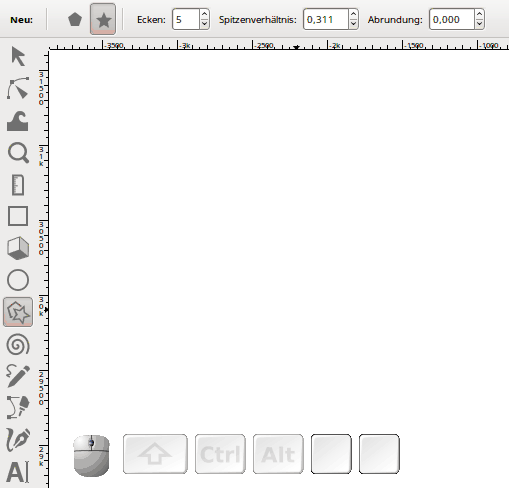
The star tool mostly does one thing: It’s fun! :-)
At the top, in its tool controls bar, you can choose if you want to draw a star or a regular polygon. You can also use these buttons to turn a star into a polygon and back again.
The number of corners or tips can also be set there.
Now play around with the tool – drag on all handles that you can find and watch what happens. If you succeed to create the right-most model, you’ll get an extra special bonus point ;-)
Bézier curves and lines
Use the Bézier tool to draw very exact Paths (that is, arbitrary shapes, which consist of Bézier curves). If you just click with it on the canvas, you create a single node. A second click creates another node and a straight line between the two nodes. Try it! A right-click will finish the path. Or, you can click on the start node to close the path.
If, for some reason, you would like to draw only vertical or horizontal lines, you can select this in the tool controls bar at the top.
You can also try what happens when, instead of repeatedly clicking on the canvas, you hold the mouse button down and drag, and only click after this (don’t use the ‘vertical/horizontal’ line mode, but the first, normal mode!). I find it a little difficult to control this behaviour, but maybe you will enjoy it!
And what’s that second button in the tool control bar for? See what happens if you create a spiro path!
After they are finished by right-clicking, all paths you create with this tool can be edited at will using the node tool.
Selection tool, Bézier tool and node tool together are probably the most important tools when you want to create a real drawing. So absolutely try to memorize the keyboard shortcuts for these three tools: s, b and n. This wasn’t so hard now, was it?
Pencil tool
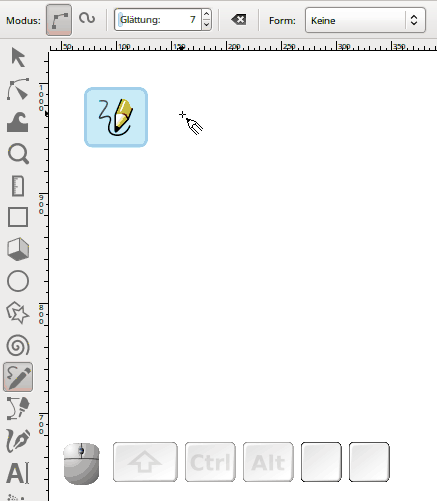
The pencil tool also draws paths. It is best used with a graphics tablet. If you are using a mouse, you should set the smoothing to a higher value in the tool bar, so your drawing will look less ‘scrawly’. Click and drag to draw – and that’s (almost) all there is :-)
Play with the different smoothing values to find out what they do.
Text Tool
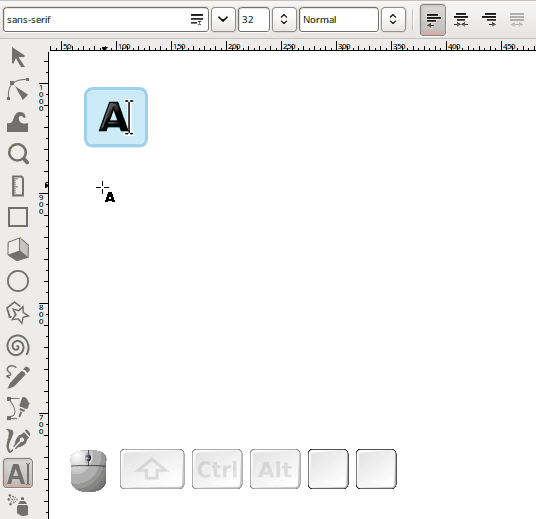
With the text tool you can – mmmh, what could it be? – write texts! But watch out: it can create different kinds of texts.
Create normal texts by clicking on the canvas and starting to type.
Flowed text can be created by clicking and dragging with the text tool.
Column text results from dragging on the little diamond-shaped handle at the end of a normal text.
You can set the font and font size in the tool controls bar (this only works when you have a text selected).
Now type something nice :-)
Important techniques
Note:
All of the mentioned techniques will always work when the selection tool is active.
If a different tool is used, some techniques will work, sometimes nothing will happen at all, or something very different will happen.
Copy, Stamp, Duplicate
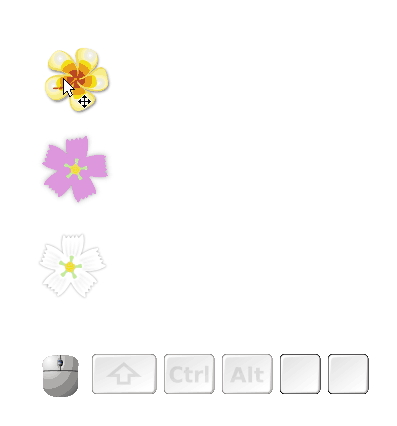
Copy works in Inkscape as it does everywhere else: with Ctrl + C.
Paste will also work as usual with Ctrl + V.
Then there’s also duplication. Select an object and press Ctrl + D. You don’t see a difference? Well, that’s because the duplicated object ended up exactly above the original object. Just drag it away a bit with the mouse, and you’ll see the object below.
Stamping is a fun feature, which lets you stamp copies of an object all over the place quickly. Hold the object with the mouse, then press the space bar to ‘drop’ a copy at the current location. Move the original a bit, then press the space bar again.
Deleting Objects
Whenever you want to get rid of an object, select it, and then either use backspace, Del or press Ctrl + X. The right-click menu (‘context menu’) also contains a menu item for object deletion.
Pasting Styles

This feature is enormously useful, so really make a mental note of this keyboard shortcut!
After you have copied an object using Ctrl + C, you can select a different object and then paste just the styling (colors, stroke width, font, font size) of the first object to the second object: press Ctrl + Shift + V.
Now make the green-blue-yellow rectangle pink-green. Go!
Changing Colors, Editing Stroke and Fill
To change the fill color, you can just click on one of the color fields in the palette at the bottom, when you have selected an object. The color of its stroke can be set with Shift + click.
See that red circle in the workshop file? Make it blue on the inside, and orange on the outside!
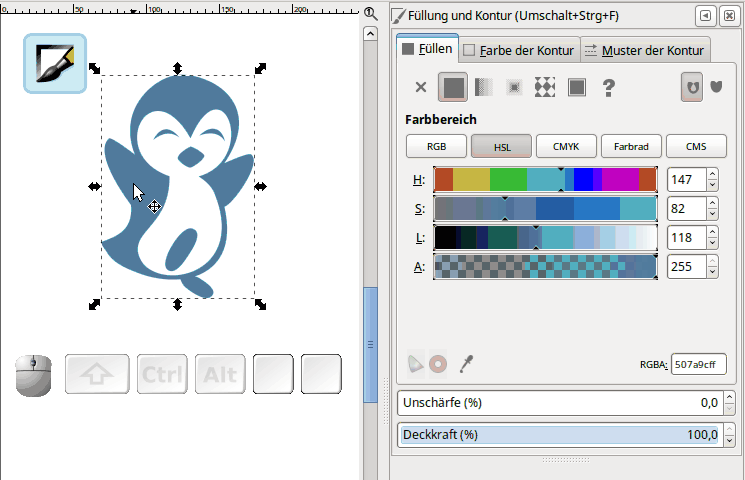
When you need to adjust a color more precisely, or when you would like to change the style of the stroke (width, dashes), you can use the ‘Fill and Stroke’ dialog for this.
Open the dialog now. It’s all boring grey when there’s nothing selected – so better also select an object!
Now take your time to look at its three tabs. The first one is for the color and type of the fill, the second one is for the color of the stroke, the third one for the style of the stroke. Read the tooltips.
Go ahead and adjust the fill color of the circle! Per default, (I think) the RGB color setter is selected – I find it’s easier to use the HSL color setter or the color wheel. Just try them all out to see which color setter suits you best.
Now adjust the color of the stroke.
And finally, try to find out how to make the stroke wider (in the third tab). You can also change the stroke’s ‘pattern’ here – how about using some dots?
Turning Objects into Paths
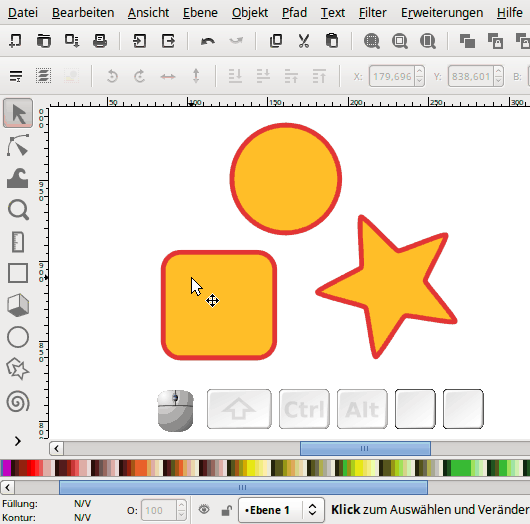
There are a few features in Inkscape, which will only ever work with paths – e.g. some path effects and some extensions. Also, if you want to change the shape of an object in a way that is not common for the respective object type – e.g. to shorten a single spike of a star, to remove the dot over an i, or to curve one side of a rectangle, you will need a path for this. But a text, a rectangle or an ellipse are not paths, unfortunately, which can lead to a situation in which you really would like to do something, but nothing happens…
In this case (after having read the hint in the status bar), you will need to convert the object to a path first. This means that you will no longer be able to edit the object in the ‘object-typical’ manner, e.g. it’s no longer possible to drag on the handles of a rectangle to round its corners, or to continue to write in a text.
Instead, it is now possible to edit the object with the node tool, for example to remove all the holes from the ‘O’s of a text – or to use one of those extensions or another feature which refuses to work on anything that is not a path.
Now try this with a rectangle and a text. Before you convert, try to edit them with the node tool. Then convert them to paths, and try the same thing again.
See? Now you can move the path segments and nodes as you like!
Group Objects together and Ungroup Them
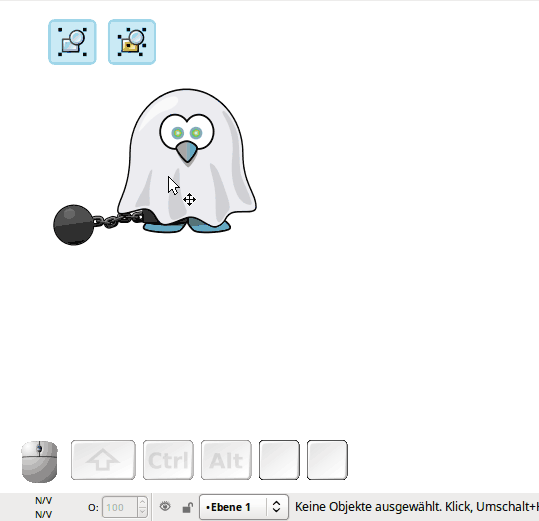
Groups are immensely useful, but sometimes, they have the habit of being confusing. When multiple objects are grouped together, they behave like a single object. It is not possible to select one of them directly by just clicking on it, as all you will get is the whole group at once.
This can be used to order your drawing, or to fix the positional relationship between objects. In a drawing which contains a face, this would help you to prevent you from accidentally moving the mouth out of the face, when both are grouped together. You would still be able to move the whole head, or to rotate it.
And when you get to the point of starting to play with transparencies, groups will become really important.
Look into the status bar when you have selected the group of rectangles on the right!
Now ungroup them, and group them again.
What happens if you double-click on a group? (note the drop down menu in the status bar!)
You can leave the group again by clicking on any object outside the group, or by double-clicking on a blank space in your document (the animation also shows this, but the double-click isn’t really easy to see. Here, too, look at the status bar).
With Ctrl + click you can always select any object, no matter if it is in a group or not.
Changing the Stacking Order (Z-Order)
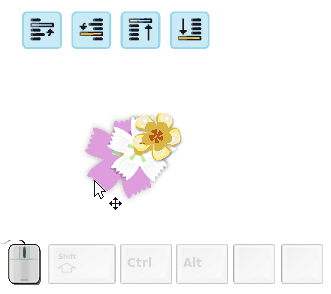
The stacking order was already explained in Part I of this workshop. Now you will learn how you can change it.
Actually, this is pretty easy: Select an object, then press PgUp or PgDown or use the stack icons in the tool controls bar of the selection tool.
Now go ahead and restack those rectangles!
Aligning and Distributing
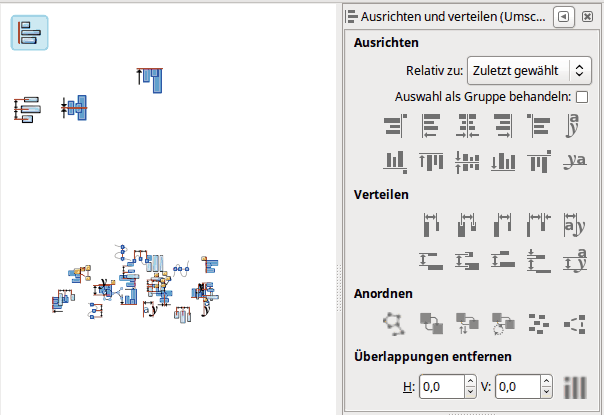
You will really need this dialog whenever you would like to neatly align objects to each other.
Open it now, and read the tooltips. Note the drop down menu at the top. This indicates the object that is meant to stay in the same place, while all the other selected objects will be aligned relative to it.
Now try to build the exclamation mark from those scattered blue boxes (Hint: center vertically! Select multiple objects with Shift + click or use the rubberband selection).
Boolean Operations
By using Boolean operations, you can create new paths from multiple selected objects. This works just like it works in maths: path + path = new path. The original paths are gone after the operation, instead there is a new path (or several), which has been created through the calculation. The stacking order of the original paths determines the result.
These operations allow to turn multiple paths into a single one, or to break one path up into multiple paths. To best understand what exactly the effect of each operation is and in which situations it can be employed most efficiently, you will need to look at them directly. At the moment, it’s not important to memorize each detail. This is more about knowing that these things exist. If in doubt, you can simply try it out – and clear up ‘accidents’ by using the undo feature. All Boolean operations can be found in the second section of the ‘Path’ menu.
Combine
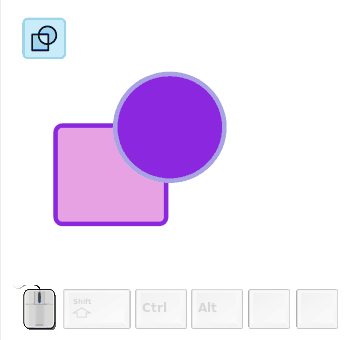
When you combine objects, all nodes and paths of all selected paths will be preserved and become part of the newly created path.
Union
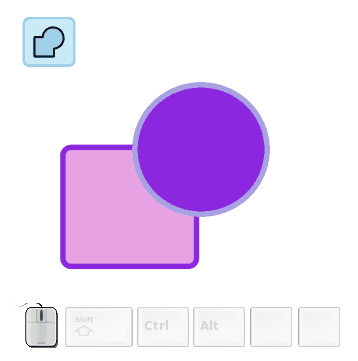
When you union objects using Ctrl + + (in the gif animation, you can only see that the Ctrl key is being pressed), the new path will be created from the common outline of the selected paths.
Difference
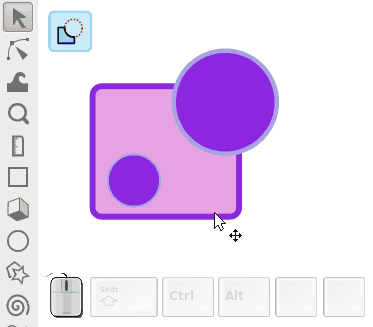
Difference punches holes that have the shape of the top path into the bottom path. This is why this operation only works (without resorting to using an extension for it) with exactly 2 selected paths.
Intersection
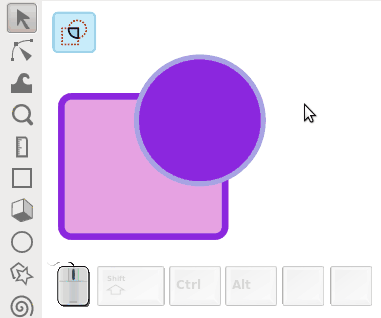
After using intersection, only those areas are left that have been covered by each one of the selected paths.
Exclusion, Division, Cut Path, Break Apart
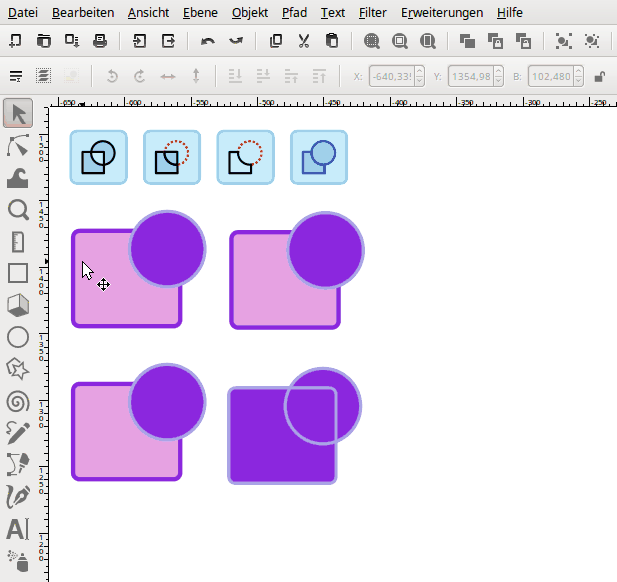
Exclusion will only keep those areas that do not overlap. Division will cut a path along the borders of the top path, and creates closed paths. Cut path cuts the bottom path’s outline in those places, where it intersects the top path. Break apart will break a path up into its subpaths, where each subpath will become a new object. The keyboard shortcuts for these operations might not work with some international keyboard layouts.
Saving your drawing
When you are done, you will most likely want to save your creation. If there’s only the slightest chance that you will ever want to edit the file again in Inkscape, by all means, save it as Inkscape SVG. This will keep the data Inkscape needs to make editing the files comfortable for you (guidelines, grids, editable stars and many more).
When you need to export a bitmap image, for example to upload to a website which doesn’t accept vector images, you should use File ⯈ Export to PNG. The dialog which now opens allows you to set a large range of options, but in most cases, you will only need to use the Page tab or the Selection tab to either export the page or only the selected objects. There you can set an image size or a resolution (choose at least 300dpi for printing, 600 is better), and select where you want to save your file to. Don’t forget to click on Export when you’ve made all your settings!
Inkscape does not export to JPG. As JPG files mean that you loose quality and get some artifacts in exchange for it, this is a deliberate decision made by the Inkscape developers.
Hint:
Inkscape also has an autosave feature, which can save a copy of your drawing in regular intervals. Use it! In some rare cases, Inkscape may crash without saving a backup file, and if you’ve been working on something really important, the autosaved files can ‘save your life’ ;-)
(Activate this at Edit ⯈ Preferences ⯈ Input/Output ⯈ Autosave)
Where can I find more info?
A great source of info is the official Inkscape website. There you will not only find an FAQ, a keyboard shortcut reference, links to the manuals and the latest news about the Inkscape project, but also lots of links to user forums, to the chat, to the mailing lists and to many different tutorials.
You can also meet people who know how to use Inkscape on Mastodon, Twitter, Facebook, Instagram and in other social networks.
There are quite a few books about Inkscape, too, not only in English, but also in other languages, and in many places, there will be live workshops held where you can learn new tricks about Inkscape. I’m also regularly offering Inkscape workshops (for example, during the Kieler Open Source und Linux Tage).
This work is licensed under the Creative Commons Attribution-ShareAlike 4.0 License. You may share and adapt the contents, as long as you publish the result under the same license and give appropriate credit.
![]() If you like to use Inkscape and want to support program development, consider to become an active member of the Inkscape community or to make a donation. Your effort will help make Inkscape even more awesome!
If you like to use Inkscape and want to support program development, consider to become an active member of the Inkscape community or to make a donation. Your effort will help make Inkscape even more awesome!

6 Comments ⚓
brynn ⚓
Sun 06 March 2016Best beginner tutorial ever!
Debra ⚓
Thu 18 August 2016I was able to download everything and start Inkscape; however, I was not able to download the Workshop File. Clicking on the link only opened a new browser tab containing the first slide. Saving it to my desktop only created a weblink. I am on a MacBookAir with the latest OS X El Capitan. Is there another place I can download the file?
Moini ⚓
Thu 18 August 2016Hi Debra,
there must be some option like ‘Save page…’ in your Safari browser (I guess that’s what you would be using on a Mac). Seems it doesn’t support the ‘download’ feature for links yet (Firefox and Chrome browsers do).
So when you see the SVG in your browser (that’s what you describe as ‘the first slide’), save it to your computer, not the link, but the whole page.
You can also look at the page’s source and copy that into an empty text file which you save as an .svg file, if the saving of a page doesn’t work for some weird reason (but it should).
Kind Regards, Maren
Debra ⚓
Thu 18 August 2016Saving as “Page Source” worked. Thanks!
Debra
bILL ⚓
Sun 18 February 2018All was going well in part 2 untill I moved to the elipse praactice. The “elipses” come up as dashed rectangles. I have clicked elipse on the side bar and full eleipse on the upper bar but nothing i do will enable a solid elipse line in reaal time ie as I drag to form the elipse?
Can someone comment? It appears Inkscape has set something and wont allow me to unset it Even if i close Inkscape without saving and open then open the exersize i get the same results??
Moini ⚓
Thu 18 August 2016Hi bILL,
seems your ellipses are transparent. Your drawing is probably full of invisible ellipses by now ;-) (you can check quickly by switching to outline view mode, via View > Display mode > Outline).
For more explanations and ways to make them visible again, see this dedicated article written by brynn from the Inkscape community.
Regards, Maren